Adding ProScan to Your Application |

|

|
|
Adding ProScan to Your Application |
|
|
Adding ProScan to Your Application |
|
|
|
Adding ProScan to Your Application |
|
|
|
|
||
Adding ProScan to your application is a simple process.
IMPORTANT: Backup your application before you start. If you do not backup and lose your application for any reason then you have no one to blame but yourself. We accept no responsibility for any possible loss due to your failure to do adequate backups.
1. Make sure that you have the global extension for ImageEx 3.6 (or higher) added to your application.
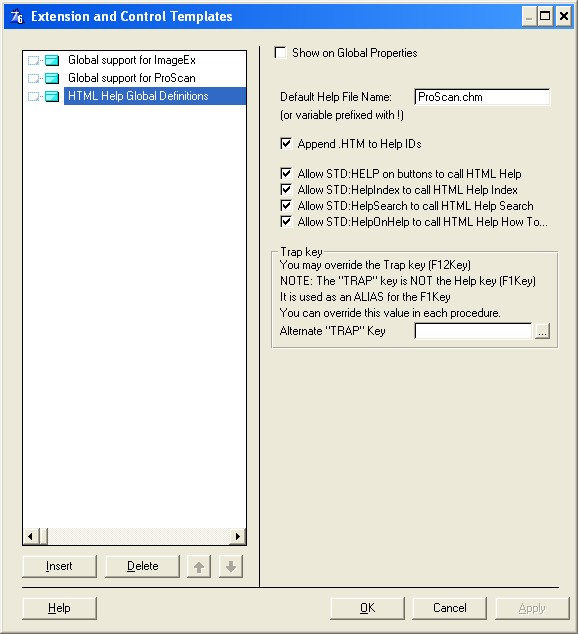
2. Add the ProScan global extension to your application. Note that there are separate templates for ABC and Legacy. Clarion will present the correct one depending on your application family.

3. Select how ProScan will store the scanning settings and profiles. You can specify either an INI file or to use the System Registry.
Note: ProScan does NOT support the use of our registry tools with Clarion C55 - only with C6X and up.
All ProSeries tools use our utility class that automatically reads and writes to either the registry or the INI file based on your selection. If you change your mind later, the class adapts automatically so you do not have to go back into the code and make changes.
The template will automatically assign an INI filename based on the application name. You can change this and you can also specify your own variable for the INI filename.
If you are using the Registry, the template will default to a root registry key of HKEY_LOCAL_MACHINE (other selections are available) and to a subkey of SOFTWARE\%application (where %application is your application name).
Hint: You can also use our RegINIClass in other programs and to control the settings of other parts of your program
Click here for details
A note about ProScan End User HTML help...
ProScan ships with a 5600+ word compiled help file that you can modify, integrate into your own help or distribute as-is.
The Global Extension template has a checkbox to toggle support for this On/Off in the ProScan and Scanner Setup procedures. By default it is turned Off.
If you check the box, then the templates will write the interface to Clarion HTML help using the file ScanManager.chm and it will set the Topic selections automatically for you.
If you integrate the default help into your own file or use a different file name, then do NOT check this box. You will then be responsible for setting the help file and topic and for adding code to initialize it in the ProScan procedures.

If you turn this procedure On, then you need to add the Clarion global extension for HTML help to your application or you will get errors.
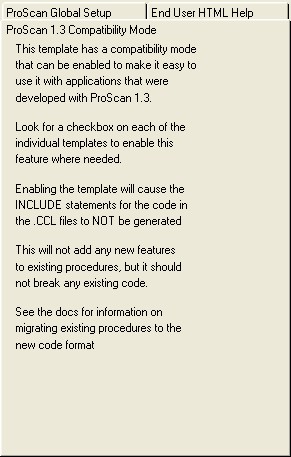
ProScan 1.3 compatibility mode
For backwards compatibility ProScan has the option to run in "ProScan 1.3 Compatibility Mode"
See the Migrating from ProScan 1.3 help for details.
4. Import the ProScan TXA into your application
In the IDE, select Application --> Template Utility
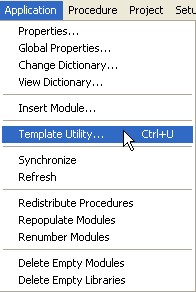
Then select the ABC (or Legacy) version of the ProScan Import:
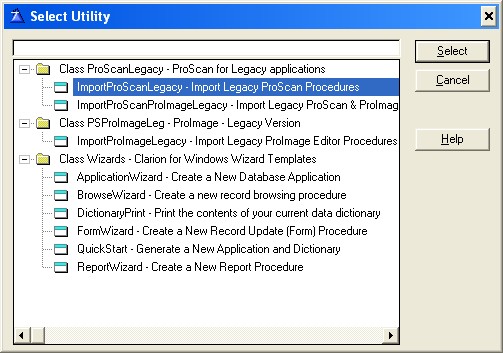
A note for ProImage users: You will notice that there is also a second utility template that will import the jumpstart procedures for both ProScan AND ProImage at the same time. If you are going to use ProImage as a page editor for your ProScan enabled application then you should select this entry. It has the ProImage call button template already in place and the data bridge between ProScan and ProImage is already setup. Then after you import the ProImage jumpstart TXAs you should go to the application global extensions and add the ProImage global extensions and check the option box that states that "other ProSeries tools are used in this application".
Click here for more details on using ProImage with ProScan.
A Special note on icons...
To give your program a professional look and feel, ProScan ships with over 200 icons from www.icons-icons.com (formerly Ace Icons)!
Similar icons to the basic ones used on the ProScan toolbars and buttons are available in all the different colors of all the different icon sets that are available.
This makes it easy for you to change out the icons to the new icon style and color of your preference.
You are free to use these icons in your programs, but keep in mind that they are a part of a commercial product. You are not licensed to sell them or give them away. If you have questions about their usage, contact www.icons-icons.com.
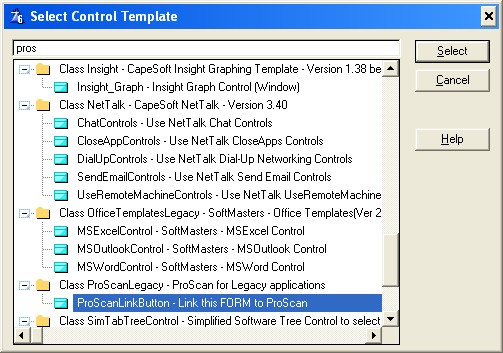
5. Add the ProScan Link Control Button template to the FORM of your parent procedure.
In the Window Formatter of the FORM for your parent procedure, click the Control Template button and type ProScan. Then select the ProScanLinkButton control template.
This will populate the following button onto your window:
![]()
Clicking this button at runtime will pass the data you are sending to ProScan and call the ProScan procedure.
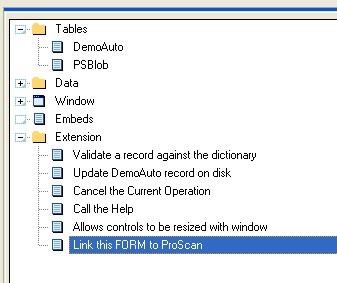
To set the ProScan Link properties, right-click the button and select ACTION or double-click the ProScan Link extension.
6. Set the ProScan Link control with your selections for file storage and data mapping.
See one of these sections for exact examples: