The General Tab |

|

|
|
The General Tab |

|

|
|
|
||
The General tab of the global support extension template is where you make some basic choices that affect how ProPath will work in your application.
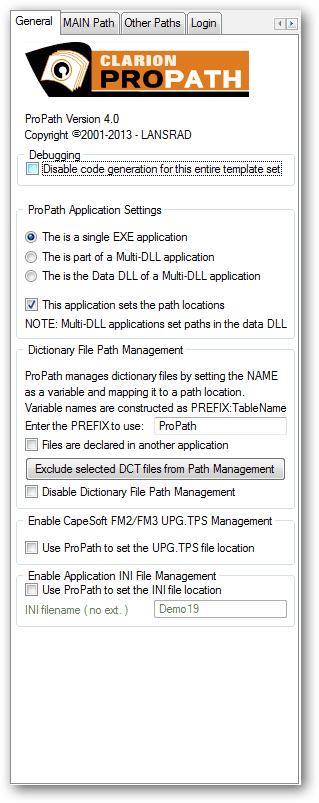
Debugging

If you check the Disable code generation for the entire template set box, then the other template tabs will be hidden and no code for ProPath will be generated anywhere in your application.
ProPath Application Settings

ProPath works with both single EXE and Multi-DLL applications.
If your program is a single EXE program, accept the default setting and your done.
If your program is Multi-DLL, you need to make your selection as shown:
For the Data DLL, check this box:

You will notice that selecting the Data DLL option automatically disables the box that tells ProPath to generate the code that sets the data path. All that happens in the Data DLL is that the class instances and global are declared and exported so they are accessible from any other part of the program.
For Other DLLs, you need to make your selection as shown:

This selection prototypes the class and global objects as EXTERNAL so that the program module has access to the items declared and exported from the Data DLL.
This option also makes it possible for that module access to the ProPath Explore Folder option that allows the user to open a copy of Windows Explorer to the data folders. All you have to do is add the #CODE template to your button or menu option.
For the Main EXE, you need to make your selections as shown:

This selection prototypes the class and global objects as EXTERNAL so that the program module has access to the items declared and exported from the Data DLL.
The "This application sets the path locations" checkbox tells the ProPath template to generate the class code needed to detect and set the data paths.
Dictionary File Path Management
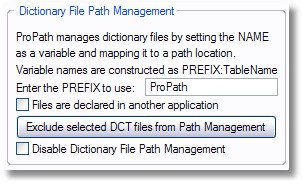
Note: In a Multi-DLL application ProPath will normally detect how it needs to export and name files based on the type of module where it is added. The Files are declared in another application is an override you can use if needed.
One of the ways that ProPath can manage files is through Dictionary File Path Management.
When enabled this feature causes the templates to replace (or add) the NAME attribute to the files in the dictionary. Then the templates create a variable for each file and rewrite the file declaration so that the variable is set as the NAME.
The variables are build by combining a PREFIX (the default is ProPath) with the table name.
Example: Customers would become ProPath:Customers (the templates will add the colon ":" for you)
After the ProPath folder objects get their assignments, each file is mapped into one of the folders.
Example: If the MAIN data folder was C:\MyData (simplified for this example)
The full path to the Customers table would be stored in the variable ProPath:Customers
The value of ProPath:Customers would be C:\MyData\Customers.tps (assuming TPS files).
If you are using SuperFiles, then you will want to exclude them from this method and use ProPath's ability to force file locations with SYSTEM{PROP:DataPath} as shown here.
Excluding Selected Files
You can use the Exclude selected DCT files from Path Management button to exclude individual files or check the Disable Dictionary File Path Management box to disable the feature on all dictionary files.
To exclude selected individual files from being redirected by ProPath, click this button:
![]()
This window will open to display the current list of excluded files:
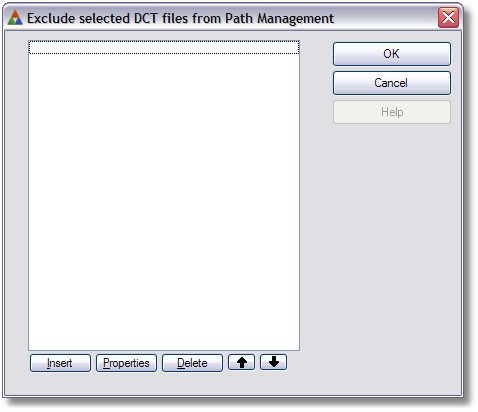
Click Insert to add a new file and this window will appear:

Select the file you want to exclude from the drop down list, then click Ok.
Your excluded file will be visible in the list as shown here:
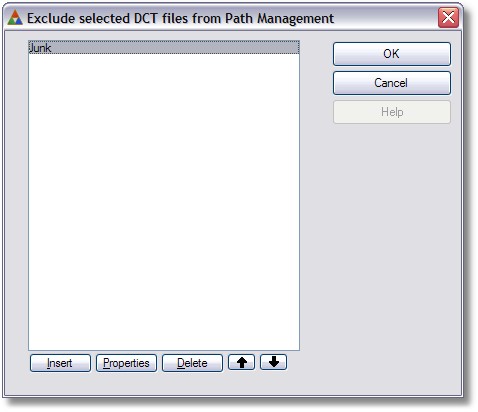
When the ProPath templates generate the code to redirect the files into your folders, the files on the exclusion list will not be in the generated code:

Disabling Dictionary File Path Management
You can turn off the file management feature for all dictionary files by checking this box.
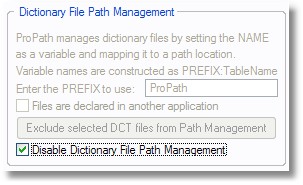
If you do that, then you will want to use ProPath's ability to force file locations with SYSTEM{PROP:DataPath} as shown here.
CapeSoft FM2/FM3 UPG.TPS Management

If you are a user of CapeSoft's FM2/FM3 templates, ProPath provides full support and direct control of the location of the UPG.TPS file.
Just check the box to enable this feature and the ProPath templates will automatically set the location of the file by embedding the ds_SetUPGPath command as shown in this example:

This code is generated directly into the FM3 Start of Initialization embed after the ProPath variable is initialized.
You can map the UPG.TPS file into either the MAIN or the optional SYSTEM data folder as you prefer.
Application INI File Management

ProPath solves a common problem that developers have by taking control of the location of the application INI file.
All you have to do is check the box to enable the feature, enter a name for the INI file and your done!
ProPath will automatically map the INI file into the selected data location and all normal GetINI/PutINI functions work as expected.
Note: This is not a hack. The code that Clarion generates will automatically generate code to use the variable specified as shown below.
ProPath takes the name you enter (this defaults to the application name)

Then it appends INI to it and creates a variable.
Then Clarion automatically uses the variable as shown below:
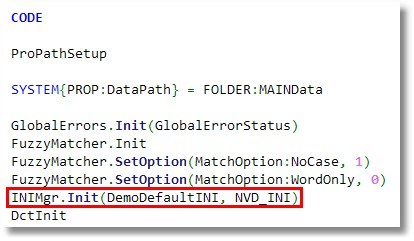
You can map the application INI into either the MAIN or the optional SYSTEM data folder as you prefer.