Creating a Deployment Container |

|

|
|
Creating a Deployment Container |

|

|
|
|
||
Simply put, "Deployment Containers" are the files that hold one or more of the files that you want to distribute at runtime on the user's PC.
These files get distributed into the application directory by your installer (or web update program) and usually masquerade as "DLL's".
ProPath comes with a precompiled application (source included) called the ProPathLoader. This makes it easy for you to create your file deployment containers,
The ProPathLoader.exe application is installed into the 3rdParty\BIN folder on C6 and the Accessory\BIN folder on C7 and there is a shortcut in the Programs Menu.
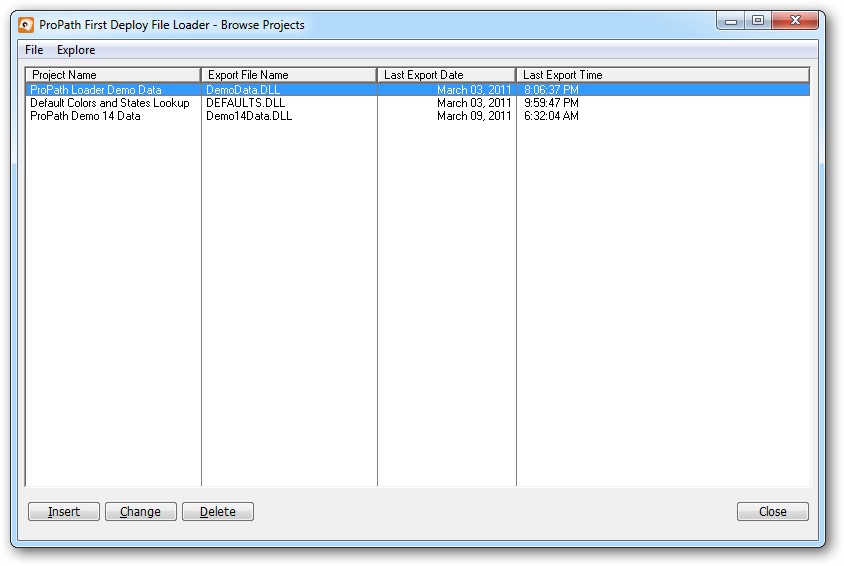
Since the loader application is a typical Clarion BROWSE and FORM, this help document only covers the mechanics of creating a new deployment file and exporting it.
Note the screen shots used are from projects already created, so they will show FORMS as being in the CHANGE mode.
To add a new project, click the INSERT button.
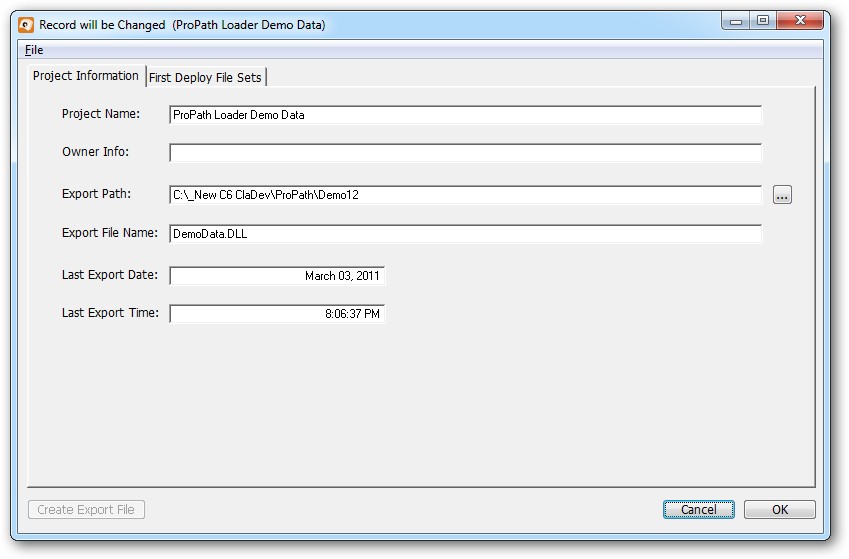
This FORM is divided into two tabs. The first "Project Information" is where you define the name and export data for the project. The second, "First Deploy File Sets" is where you add files to the distribution list.

Project Information
Project Name
The Project Name is just a descriptive name for this deployment file. It is NOT the name of the deployment container file (a.k.a. Export File).
Owner Info
The deployment container file is a TPS data file. You can set a OWNER STRING value here to prevent users from opening the file with the TopScan (or similar) utility.
NOTE: Any value you enter here must be entered in the ProPath template EXACTLY the same or your file deployment will fail.
Export Path
The export path is where the deployment container file will be created when you do the export.
During development you should make this path the folder where you are running your compiled application.
When you deploy your application to the end user, the deployment container file should be placed in the application directory along with the EXE file.
Export File Name
By default the loader application will take the name of the project and add a .DLL to it for the file extension.
We suggest that you use single word filenames (no spaces) with a .DLL extension for the export name. That way your deployment container will appear to be just another of the normal files in the program folder.
Last Export Date
This is the date of the last time the files in this project were exported. It is set automatically by the ProPath loader program.
Last Export Time
This is the time of the last time the files in this project were exported. It is set automatically by the ProPath loader program.
First Deploy File Sets
After you have setup the information on the first tab, click the second to add files to the distribution list.
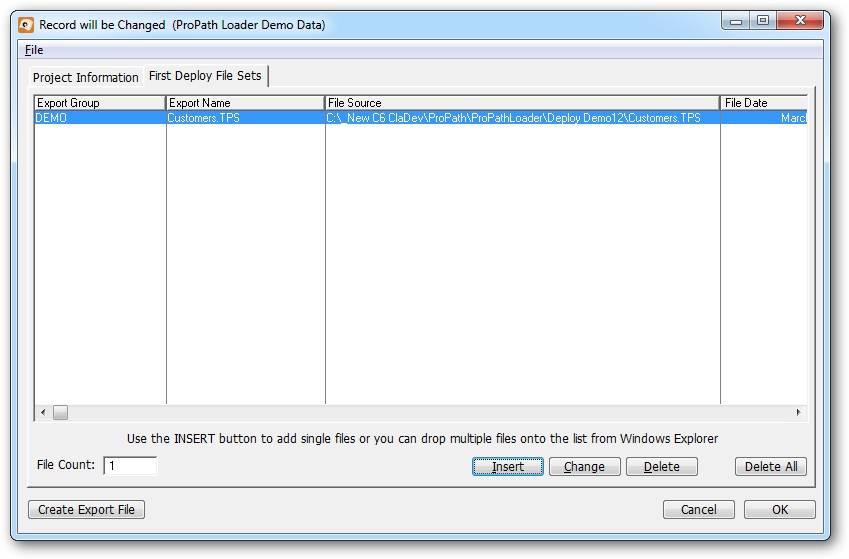
Hint: You can open Windows Explorer to a folder that contains the files you want to add to a distribution list.
Select one or more files and Drag them over the ProPathLoader icon on the windows task bar.
Then the ProPathLoader application pops to the top, you can mouse over and drop the files onto this screen (the second tab ONLY).
When you do that, you will see the following window open:
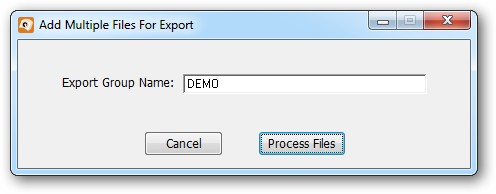
All you have to do is type in the name of the Export Group** ( **see below for more about this ) and click the Process Files button to quickly add files to the distribution list.

File Count
The File Count field is a read-only indicator of how many files are in the distribution set.

Delete All Button
The Delete All button allows you to delete ALL of the files in the distribution set.

Insert, Change and Delete Buttons
These buttons call the FORM below where you can add, change or delete individual files from the distribution list.
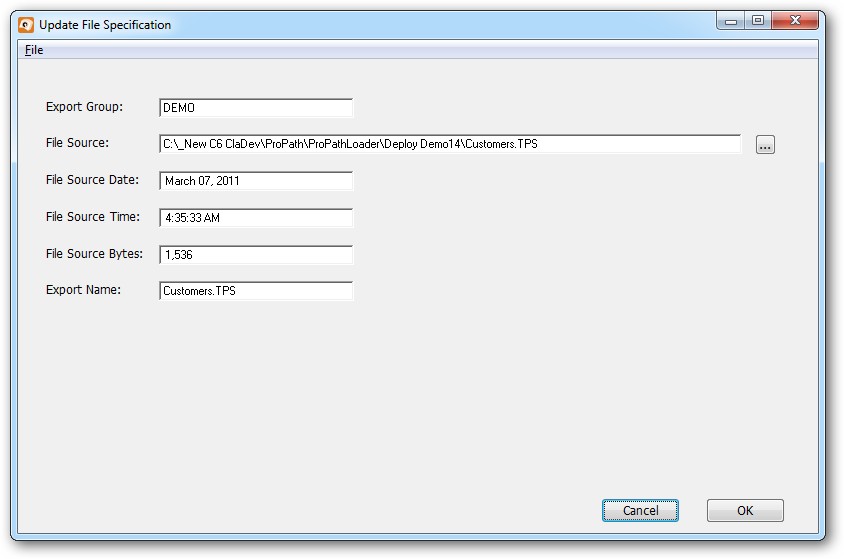
Export Group
The Export Group is used to tell ProPath where and when to deploy the file (or files) in the templates.
File Source
The File Source is the full path to the file that is to be added to the distribution group. If the file does not exist at the path specified, the export of the distribution group will fail.

The FILE DIALOG button is used to select a single file manually from your computer.
File Source Date
This is the date stamp of the source file at the time it was added.
File Source Time
This is the timestamp of the source file at the time it was added.
File Source Bytes
This is the size in bytes of the source file at the time it was added.
Export Name
This is the name of the export file (extracted from the path).
Exporting the distribution container file

Once you have all the files added to the export group that you want to add, click the Create Export File button to package the selected files into the distribution container file at the location specified.
Since the ProPathLoader executable that ships with the program is a code signed and manifested EXE, it installs to the Program Files folder as it should.
It's data files are created under the My Documents folder and the INI file is maintained under Application Data ( APPDATA ) - all by ProPath of course.
However the distribution container file for each project is created at the location specified in the Export Path of the Project Information tab.
When you click the Create Export File button, you will see this screen:
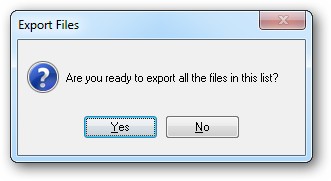
After you click Yes, the export file is created in the path specified (the path must already exist).
If you click No, the export is aborted.
Reminder: Be sure that you export the file to the folder where you are running the application from during development (or copy it there). Then the export file should be deployed in the application folder by your installer.
ProPath expects the export file to reside in the same folder as the application executable.