Using the Insert TIFF Feature |

|

|
|
Using the Insert TIFF Feature |
|
|
Using the Insert TIFF Feature |
|
|
|
Using the Insert TIFF Feature |
|
|
|
|
||
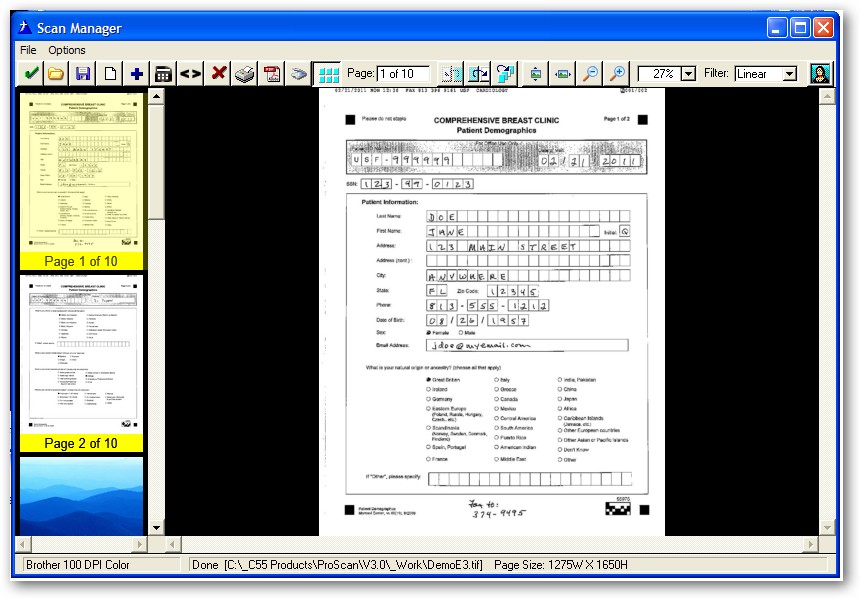
To activate the Insert TIFF Feature, click this button on the Scan Manager toolbar:

Then the following menu will appear:
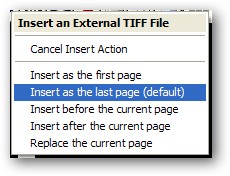
Your options for how the External TIFF get inserted into the one in the Scan Manager are as follows:
As the first page - the page(s) of the new TIFF get inserted at the front of the TIFF file in the Scan Manager
As the last page - the page(s) of the new TIFF get inserted at the end of the TIFF file in the Scan Manager
Before the current page - the page(s) of the new TIFF get inserted before the current page of the TIFF displayed in the Scan Manager.**
After the current page - the page(s) of the new TIFF get inserted after the current page of the TIFF displayed in the Scan Manager **
Replace the current page - the page(s) of the new TIFF replace the current page of the TIFF displayed in the Scan Manager **
** In the case of a multipage TIFF being inserted, the first page is inserted according to the menu selection, then the other pages are inserted in the order that they were in the external TIFF file
After the menu selection is made, the internal TIFF viewer opens:
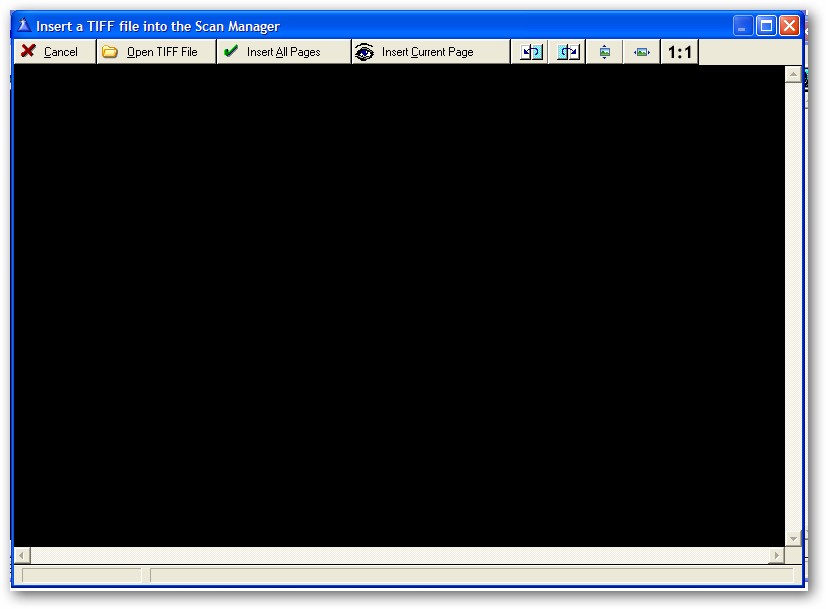
The options available on the TIFF viewer toolbar are:
Cancel - return to the editor with no image.
Open TIFF File - load a TIFF File from disk with the standard ImageEx picture dialog.
Insert All Pages - sends the ALL of the pages of the TIFF viewer back to the editor.
Insert Current Page - sends the current page displayed in the TIFF viewer back to the editor.
Previous - moves backwards one page in the TIFF file.
Next - moves forward one page in the TIFF file.
Zoom to Height - resizes the page of the TIFF file to the height of the viewer.
Zoom to Width - resizes the page of the TIFF file to the width of the viewer.
Zoom 1:1 - display the page of the TIFF file at its original size.
When a TIFF File is loaded, it is displayed in the viewer:
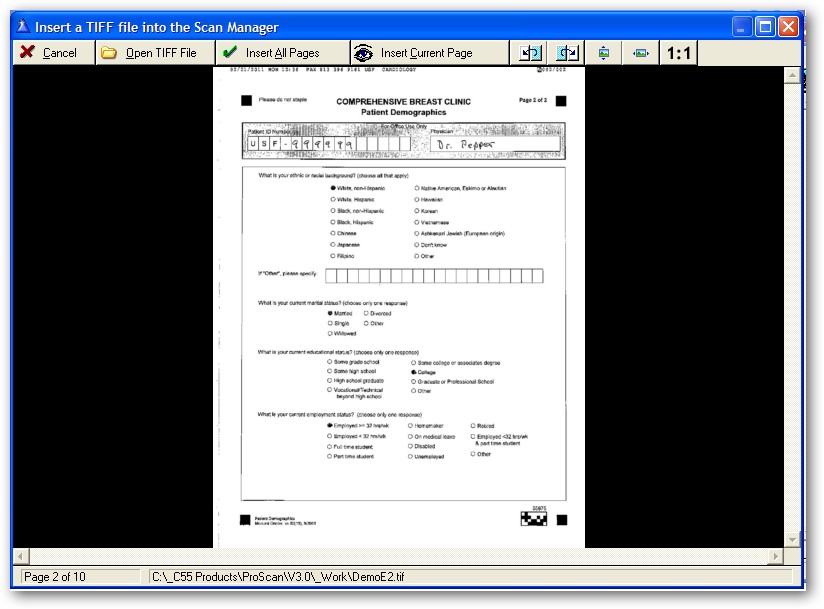
The status bar displays the TIFF name as well as the current page number being displayed and the total number of pages.
The user moves forward or backwards in the TIFF with the toolbar buttons (as well as the Up, Down, Left, Right, PgUp or PgDn keys).
Then they click the Insert All Pages or Insert Current Page button to send the TIFF page(s) back to the editor
Note: It does not matter if the multi-page TIFF contains photos, scanned documents or both. You can still select one or all pages from it with ease.
When the TIFF page(s) are returned to the Scan Manager, they are automatically inserted into the correct position and the thumbnail navigation is automatically updated: